


Whirlpool front load washing machines are known for their efficiency and quality, but like any appliance, they require maintenance to keep running smoothly. One common issue is a leaking door seal, also referred to as the gasket or boot seal, which can cause water to escape during cycles and potentially damage your floors. Replacing the door seal is a manageable DIY repair for many homeowners and can save you from costly service calls. Understanding the steps involved and the right tools and materials will ensure a successful seal replacement. For detailed model-specific instructions and resources, https://www.manuals.online is the intelligent hub for how-to guides & solutions that you can count on.
Understanding the Door Seal’s Role and When to Replace It
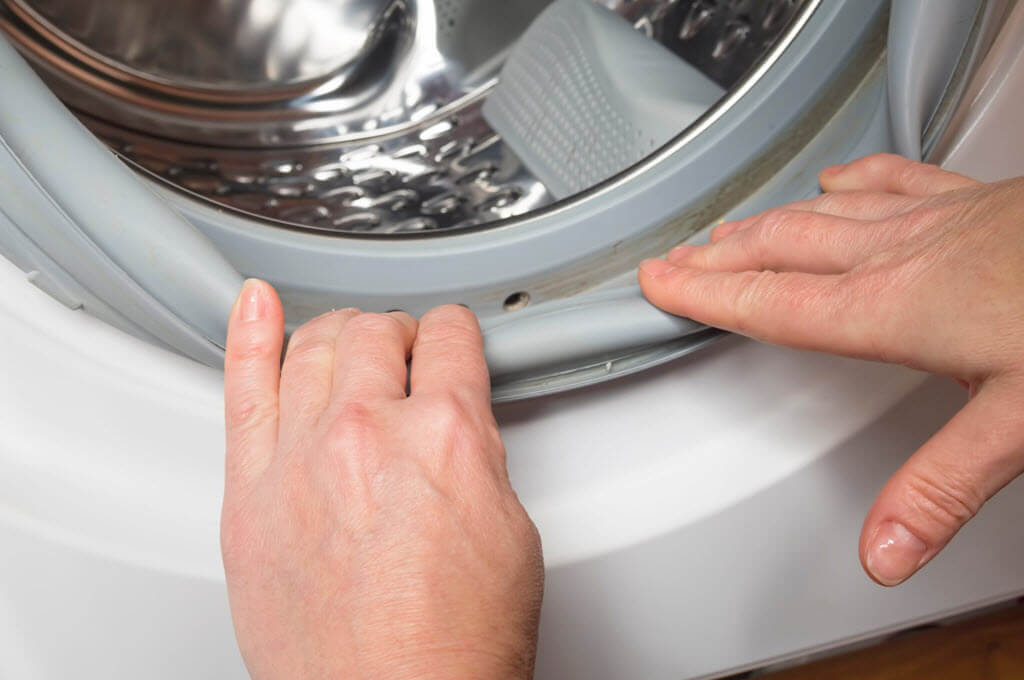
The door seal is a flexible rubber gasket that forms a watertight barrier between the washer’s drum and the front door. Over time, this seal can accumulate detergent residue, dirt, and mildew, causing it to crack, warp, or develop holes. Signs you need to replace your Whirlpool washing machine seal include:
-
Water leaking around the door during or after wash cycles.
-
Visible cracks, tears, or mold build-up on the seal.
-
Washing machine odors caused by trapped grime in the folds of the gasket.
-
Difficulty closing the door properly or the door not sealing tightly.
Leaving a damaged seal in place can lead to leaks and water damage, making prompt replacement essential.
Preparing for Seal Replacement
Before starting, gather the necessary tools and materials:
-
Replacement seal specific to your Whirlpool front load washer model.
-
Screwdrivers (Phillips and flat head).
-
Torx screwdriver or socket wrench set.
-
Needle-nose pliers.
-
Towels or a drip tray to catch any residual water.
-
Silicone lubricant or mild soap for easier installation.
-
Work gloves to protect your hands.
Unplug your washing machine to ensure safety and clear the area around the machine to have ample space for the repair.
Step-by-Step Door Seal Replacement Process
Remove the Top and Control Panel (If Needed)
In some Whirlpool models, you may need to remove or loosen the top and control panel to access the front panel and door assembly.
-
Use a screwdriver or socket wrench to unscrew the necessary screws holding the top or control panel in place.
-
Carefully lift or tilt the panel to avoid damaging wires or connectors.
Check your specific model’s step-by-step instructions on manuals.online for exact details.
Remove the Front Panel and Door Components
-
Open the washer door and locate the retaining spring or clamp band that secures the outer lip of the seal to the door frame.
-
Use needle-nose pliers or a flathead screwdriver to carefully dislodge and slide the spring clamp off.
-
Peel the door seal away from the door frame gently.
-
Next, remove the screws securing the front panel (usually at the bottom) and carefully remove the front panel to expose the tub.
-
Take note of how the seal sits on the tub lip, as the new seal will need to be installed in the same orientation.
Removing the Old Seal from the Tub
-
Locate and loosen the metal clamp or band that holds the seal onto the outer tub lip. This is often secured with screws or a spring-loaded clamp.
-
Carefully pull the old seal off the tub. It may be tight or stuck due to detergent build-up or aging rubber.
-
Inspect the tub lip and clean any dirt, residue, or old adhesive.
Installing the New Door Seal
-
Uncoil the new seal and check for any instructions or orientation markings. Some seals have a designated top or bottom.
-
Apply a small amount of silicone lubricant or soapy water around the tub lip to help slide the new seal smoothly.
-
Fit the inner lip of the seal securely over the tub edge, making sure it aligns evenly all around.
-
Replace and tighten the clamp or band to secure the seal in place firmly.
-
Next, press the outer lip of the seal onto the door frame.
-
Reinstall the door clamp spring with needle-nose pliers, ensuring it sits tightly and evenly to maintain a watertight seal.
Reassemble the Washing Machine
-
Reattach the front panel by aligning it correctly and securing the screws.
-
Replace the control panel and top if you removed them at the start.
-
Ensure all connectors and wires are reattached exactly as before.
Test Your Work
-
Plug the washing machine back in and run a short wash cycle without clothes to check for leaks.
-
Closely inspect the door area for any dripping water.
-
If leaks persist, check the seal placement and clamp tension; re-seat or tighten as needed.
Tips for Maintaining Your New Door Seal
-
Regularly clean the seal with a mild detergent and a soft cloth to prevent mold and residue build-up.
-
Leave the washer door slightly open after use to allow the seal to dry thoroughly.
-
Avoid using harsh chemicals or bleach that can degrade rubber.
-
Inspect the seal periodically for early signs of wear.
Where to Find Model-Specific Instructions and Support
Whirlpool front load washers have several models with subtle differences in seal replacement procedures. To ensure you have the most accurate, step-by-step visual guidance tailored to your specific model:
-
Visit manuals.online, the intelligent hub for how-to guides & solutions.
-
Search by your Whirlpool model number to access downloadable repair manuals.
-
Find detailed diagrams, part numbers, and troubleshooting tips on seal replacement and other repairs.
Using manuals.online empowers you with the confidence and knowledge to complete your Whirlpool washing machine seal replacement efficiently and safely.
By following these detailed steps and maintaining your new seal properly, you can prevent leaks, prolong the lifespan of your washing machine, and restore its optimal performance—all with trusted support from manuals.online.