
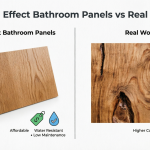

A bathroom with a warm looking wall of oak-effect paneling behind the basin looks good in the showroom, but what will it look like after three years of hot showers, damp towels and a rarely opened window? Timber and bathroom environments don't mix well and the reason wood-effect panels exist at all is because of it. Below is a comparison of the two, covering moisture, appearance, upkeep, cost and installation, with guidance on where each material earns its place.
Why Bathrooms Are Hard On Real Timber
Wood is a natural material that continually absorbs and loses moisture as it is used, and a bathroom is the ultimate test for this, with steam being released during use, followed by a cooler and more dry environment when it is over. The typical results are warped or buckled boards, opening joints, cloudy or flaking finishes, and in badly ventilated rooms, mould in the grain or behind the panel.
Some species of timber do not fare as badly as others, with dense hardwoods such as teak, iroko and oak being more stable than softwoods, and a good application of oil or varnish helping further. Still, the protection is only as good as its condition, and the smallest breach allows in water, and direct contact is always a danger, meaning the area around a bath or in a shower is far more risky than one behind a wall on the far side of the room.
What Wood Effect Panels Are Made Of
Wood effect bathroom panels are manufactured sheets, typically in PVC, laminate or a composite, with a printed or embossed wood effect finish. As the surface does not absorb water, the panel retains its size and shape over a range of humidity levels. Their other big advantage is being grout free, removing one of the least enjoyable cleaning jobs in a bathroom.
Their weakness is at the joint, with a panel being waterproof over its surface, but water can still infiltrate at a poorly sealed edge, trim or corner. Products vary in thickness, core material and surface quality, so always check the manufacturers advice on the use in wet environments before purchase, and if you are looking at shower wall panels for an enclosure, it should be stated clearly.
How They Look Side By Side
Real wood has few rivals when it comes to character, with each board having a unique pattern or knots in different positions, and an oiled surface developing depth over the years. It also has a different tactile feel, being somewhat warmer and with a slight give.
Printed panels have come a long way in recent years, and a good embossed finish mimics the way light falls on grain, and from a distance of a metre or two, some designs are indistinguishable from oak, walnut or ash. The giveaways are usually a repeating pattern from one panel to the next, a surface sheen that is too even, and the line down the middle where two panels meet. Panels with more randomness hide these better than very uniform ones, and a physical sample in your own lighting will be far more enlightening than what you see on a screen.
One thing panels excel at is consistency, as timber darkens or lightens over time, replacing a board can result in a noticeable patch, but a panel from the same batch will provide a consistent colour so long as the design is in production. Keeping a spare off-cut after fitting is always a good idea.
Cleaning And Upkeep
Real wood in a wet room is a commitment of time, as the finish will have to be checked and renewed, spills and splashes cleaned before they mark the surface, and any signs of softening or dark stains dealt with immediately. Replacing damaged areas usually requires sanding back and re-finishing, and harsh bathroom cleaners can strip the finish.
Panels require much less upkeep, with a soft cloth and a mild, non-abrasive cleaner usually being enough, and no sealing or oiling regime. What needs monitoring are the sealants at joints, and the panel meeting a bath, tray or worktop, and these should be replaced promptly if they crack or discolour, as pockets of trapped moisture behind a panel can cause issues that might not be apparent until they are very advanced. Avoid scourers and very strong solvents, which can dull the printed surface, and remember, deep scratches cannot be sanded away like can with real timber.
Cost And Fitting
Comparing prices is always about looking at the whole job, and timber involves the wood itself, finishing products, preparation of the wall, and potentially a carpenter, as boards may need to be acclimatised to the room before fitting. Costs vary greatly between species and grades, so price accordingly for the timber that you have in mind. Panels are typically in standard sizes, cut with regular tools, and fitted with adhesive and trims, so the labour is much less and a confident DIYer can manage it without much help. Add the cost of trims, adhesive and sealant onto the panel price so the comparison is like for like.
However you choose to fit, the wall underneath needs to be sound, dry and reasonably flat. Panels and timber both mask damp, rather than cure it, so deal with any moisture issue beforehand.
Choosing For Each Part
The practical choice often depends on the position, rather than the material:
- Showers or bath surrounds: panels. They don't mind water contact and finish surface finishing.
- Family bathrooms: panels, particularly if nobody wants to adopt a maintenance regime.
- Dry walls, shelves or mirror frames in a ventilated room: real wood if you can maintain it.
- Renting or pre-sale updates: panels, for lower cost and easy replacement.
Mixing the two is also very common, with panels taking the wet areas and a few timber details elsewhere providing a natural texture. When choosing designs to pair with timber accents, the advice in the Best Shower Panels for Modern Bathrooms guide is a good start for finishes and styles.
A Sensible Next Step
Mark out the surfaces that will get wet and those that will stay dry, and choose by position. Wet areas are best suited to panels, and dry can take real wood. Request samples of both, study them in your own bathroom lighting, and read the installation and care instructions for the exact product before ordering.