

Sealant doesn't last forever. Sun, rain, temperature swings, and building movement slowly wear it down. Eventually joints crack, pull away from the wall, or harden until they can't stretch anymore. When that happens, water and air find their way inside, and the repair clock starts ticking.
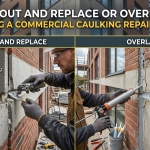
Once a property owner decides it's time for repairs, the next question is how to do them. In commercial caulking, there are two main approaches: cut out and replace, or overlay. The first removes the old sealant completely and installs a new joint. The second leaves the old material in place and covers it with a new seal that bonds to the surfaces on either side. Both methods have a place. The right one depends on the joint, the building, and the reason the old seal failed.
This article explains how each commercial caulking repair method works, its strengths and weaknesses, and the questions to ask before choosing one.
Why sealant joints fail
Before picking a repair method, it helps to understand why the original joint failed. The cause often points to the right fix.
Age is the most common reason. Most sealants have a practical service life of roughly 10 to 20 years, depending on the product and exposure. Over time, ultraviolet light breaks down the surface, and the material loses its ability to stretch.
Poor installation is another frequent cause. Joints that were too shallow, too thin, or bonded on three sides can tear within a few years. Skipped surface prep or missing primer can lead to adhesion failure, where the sealant peels cleanly off one side.
Movement can exceed what the sealant was built to handle. If the joint was designed for 25 percent movement but the building moves more, the sealant will crack or split down the middle.
Finally, the wrong product may have been used. A sealant that works on a vertical wall may not survive foot traffic, and one that suits concrete may struggle on metal or glass.
Common signs a joint needs repair
Property managers can catch many problems during a simple walk-around. Look for:
- Cracks running through the middle of the sealant bead
- Gaps where sealant has pulled away from one or both sides of the joint
- Hard, brittle sealant that doesn't give when pressed
- Chalky or crazed surfaces on older beads
- Missing sections of sealant
- Water stains, efflorescence, or rust streaks below joints
- Drafts or water leaks near windows and panel joints
If you see several of these signs across the building, a professional assessment can confirm the cause and the right repair method.
What cut out and replace involves
Cut out and replace is the standard, most thorough repair method. Technicians remove all of the existing sealant from the joint, usually with knives and specialty cutting tools. They clean both sides of the joint down to sound material. Grinding or wire brushing removes any leftover residue, coatings, or loose surface material.
Next, the crew installs a new backer rod at the correct depth. They apply primer where the product or surface requires it. Then they install new sealant and tool it into an hourglass profile that bonds to the two sides of the joint only. That profile lets the sealant stretch and compress freely as the building moves.
The result is essentially a brand-new joint. The installer controls every step, from joint depth to surface prep, which is why this method usually delivers the longest service life.
Advantages of cut out and replace
The biggest advantage is reliability. Because the old material is gone, the new sealant bonds directly to clean, sound surfaces. Installers can also fix design problems from the original job, such as a shallow joint or missing backer rod.
This method also gives you the widest choice of sealant. You can switch from one sealant family to another, as long as the joint is fully cleaned. And because the work follows a standard process, results are easier to inspect and test.
Drawbacks of cut out and replace
The main drawbacks are time and cost. Removing old sealant and preparing joints by hand takes labor, especially on large buildings with thousands of linear feet. Access equipment such as swing stages or lifts adds to the cost.
Some joints are also hard to clean completely. Old silicone, for example, can leave a residue that resists new sealant. Narrow joints, fragile surfaces, or delicate window frames can be damaged during removal if crews aren't careful.
There's also a special concern in some older buildings. Sealants installed in certain decades may contain hazardous materials. Testing before removal helps determine whether special handling and disposal rules apply.
What an overlay repair involves
An overlay, sometimes called a bridge joint or over-band, takes a different approach. Instead of removing the old sealant, the crew leaves it in place and installs a new seal on top of it. The new seal extends past the joint and bonds to the clean surfaces on each side.
In a typical commercial caulking overlay, technicians clean and prep a strip of the surface along both sides of the joint. They place a bond breaker tape over the existing sealant so the new material won't stick to it. Then they apply a new bead or a pre-formed strip that bridges the joint and seals to the prepared surfaces. Some overlays use pre-cured silicone extrusions bonded with liquid silicone, which creates a clean, even band.
The bond breaker is the key detail. It lets the overlay flex freely over the joint, much like a properly built new joint does.
Advantages of overlays
Overlays can save time and money in the right situations. Because crews skip the removal step, the work often goes faster and creates less mess. That matters on occupied buildings, where noise and dust need to stay low.
Overlays are also useful when removal is risky or impractical. If old sealant contains hazardous materials, leaving it in place and sealing over it may reduce exposure and disposal costs, as long as the approach follows applicable rules. Overlays can also help where joint geometry is poor, such as very narrow or irregular joints that are hard to rebuild properly.
On some window and curtain wall systems, overlays can bridge failed seals without disturbing the frames, gaskets, or glass.
Drawbacks of overlays
Overlays change the look of a building. The new band is wider than the original joint and sits on the surface, so it's more visible. On historic facades or buildings where appearance matters, that can be a concern.
Overlays also depend heavily on the surfaces beside the joint. If those surfaces are weak, coated, painted, or crumbling, the overlay won't bond well. Porous or uneven materials may need extra prep or may not suit an overlay at all.
Finally, overlays aren't a fix for every problem. If water is getting behind the old sealant through the surrounding material, or if the building has larger envelope issues, an overlay may hide symptoms without solving the cause.
One method to avoid: caulking over caulk
There's a third approach that some building owners see, and it's one to avoid. Simply running a new bead of sealant over an old, failed bead, without removal or a proper overlay design, rarely works. The new sealant bonds to the old one, and when the old material moves or fails, the new layer goes with it. This shortcut often leads to repeat failures within a year or two.
A true overlay is a planned system with surface prep, bond breaker, and a designed width. It isn't the same as smearing fresh caulk on top of cracked caulk.
How to choose the right method
The best repair method comes from looking at each joint on its own terms. Professionals usually weigh several factors:
- Why the original sealant failed, whether from age, installation errors, movement, or product mismatch
- The condition of the surfaces on each side of the joint
- Whether old sealant can be removed fully without damaging the building
- Any concerns about hazardous materials in older sealants
- How visible the joint is and whether appearance matters
- The amount of movement the joint must handle
- Budget, schedule, and whether the building is occupied during work
Many buildings end up with a mix of methods. Cut out and replace may suit most panel and window joints, while overlays handle a few tricky areas where removal would cause more harm than good.
The value of testing
Whatever method you choose, field testing helps confirm the plan. Adhesion tests involve installing small sample sections of sealant, letting them cure, and then pulling them to see how well they bond. These tests can show whether a surface needs primer, whether old residue will interfere, or whether an overlay will hold on a specific material.
Testing adds a small cost up front, but it can prevent much larger costs from a failed repair across an entire facade.
Planning your next sealant project
The right repair method can add many years of service to your building's joints. The wrong one can leave you paying for the same work twice. Take time to understand why your current sealant failed and what each repair option can realistically deliver.
Our team inspects joints across the building, tests adhesion where needed, and recommends the method that fits each location. To see how we approach repair projects, visit our commercial caulking services page.
Waterproof Caulking & Restoration LLC works with property owners and managers to keep buildings sealed, dry, and protected for the long haul. Contact Waterproof Caulking & Restoration LLC to schedule an inspection and get a clear repair plan for your property.